Puppy is a version of the Linux Operating System that is intended to run on personal computers. The use of this system is to offer the security that is not what it should be with the Microsoft Windows operating systems. Puppy is to be used to browse the Internet when the 'reliability' of URLs is in question, that is, there may be a security issue. When Puppy is used properly, no harm will come to your computer or its contents, no matter how malicious are the intentions of the writers of the webpages that you happen to visit. Your usernames, passwords, account numbers, etc. are not available to be stolen.
Puppy is used in lieu of the Windows environment. But, the User may conveniently go back and forth between operating systems by restarting the computer, and choosing which operating system is to be used.
Any Internet use that involves banking or any financial transactions should not be performed in the Windows environment. Use Puppy instead for this purpose.
For Users who do nothing but Internet browsing, 'doing email', and using the equivalent of Microsoft Office Word and Excel, Puppy is able to supply all of the computer needs of the User, and much, much more.
In any event, we want to keep intruders from reading or modifying anything on your disks. This can be accomplished by the proper use of Puppy Linux.
Our custom version of Puppy Linux is distributed by the Tulsa Cassandra Society by the use of a USB thumb (flash) drive which we will call the Puppy Boot Device.
The Puppy Boot Device holds all of the Puppy Linux operating system files that are invariant under program execution; i.e., each file is not changed in any way while Puppy is running. When a Puppy User wants to save a file, another USB thumb drive or even a conventional hard drive may be used for this purpose. If the User's files are saved properly on the user thumb drive, this thumb drive can be read and written in a Windows computer. All the files can be used just as if they had been created in another Windows computer.
In a machine with Windows installed, the BIOS should be modified so that the BIOS boot sequence is such that the CD is examined before the USB, which in turn is examined before any hard drive. So, when the power is turned on and when a Puppy Boot Device is present in a USB socket, Puppy Linux will be booted. When a Puppy Boot Device is not inserted, when the power is turned on, Windows will be started. If booting is required at any time from some (alien) CD, simply by inserting the CD and pushing the computer Reset button, the compact disk will boot, without requiring the removal of the Puppy Boot Device which is inserted in a USB socket.
Things to do in Windows before booting Puppy for the first time.
For the moment, let us assume that the User's computer has a CD/DVD drive and an available USB socket. Also, we assume that without our doing anything with the Puppy Boot Device, when the power is turned on, some version of the Microsoft Windows operating system boots properly.
There are a few things that we must do before we boot Puppy for the first time. These are:
1) Check the proper operation of the uninterpretable power supply (UPS) that powers the computer. If it does not function properly, repair it. If one is not there, go buy one and install it.
If your computer is a laptop with battery power, the UPS is not mandatory.
If the user is running without a UPS, and the power fails, the user will lose all of the user files that has just been created, i.e., since the last boot.
2) Power up the machine. Quickly hit F2, DEL, or whatever your machine tells you to execute the BIOS Setup program. Hit the Boot key. Change the boot sequence (if necessary) so that CD is first, then USB, then hard drive. Save your settings and boot Windows.
3) If you ever want to access email in Puppy, execute the Mozilla Thunderbird program in Windows. Select "Address Book". Then, "Tools>Export". Choose a name and save your address book as a .ldif file.
4) Also, if you want email in Puppy, execute the Mozilla Thunderbird program, click on your account folder name. Click "View Settings for this Account". For future reference, write down your email address, your pop3 (or imap) server name, and your smtp server name. You may need this information during the Puppy installation.
5) Find out and write down the webmail address for your email account. You will use this URL to access your email using any computer browser, like Firefox or Pale Moon. Accessing in this way allows the user to avoid using programs such as Thunderbird or Outlook.
6) Find out and write down the manufacturer and the precise model number of the printer that you want to use.
7) Insert the Puppy Boot Device in an available USB socket.
8) Shutdown Windows.
The initial boot of Puppy Linux
Make sure that the Puppy Boot Device is inserted.
Turn on the power to the computer. Puppy should boot. After a short time you should see a desktop with a lot of pretty icons. If you do, Puppy Linux is booted and ready for use at this time. However, there are a few additional tasks that you need to perform after initial bootup, that is, if we want to do any useful work. So, perform the following tasks:
1) Check for the proper access to the Internet.
The Internet browser is already installed in Puppy. It is brought into action by clicking the "Browse" button on the desktop. So, click the "Browse" button on the desktop. If a page is presented that mentions the name "Google", you are now connected to the Internet. If not, you must execute step 2. Otherwise you may proceed directly to step 3.
2) Connect to Internet:
   Click the "Connect" Icon.
   The Internet Connection Wizard will start.
     Choose the selection, "wired or wireless LAN".
     Choose the selection, "Simple network setup".
   This will show the network connections that are available.
     Choose the desired connection, e.g., "eth0"
   A screen will appear that states that the connection was successful.
     Click "O.K.".
   Exit the Welcome Woof Woof Screen.
3) Set up a printer by clicking "Install", then select the CUPS printing Wizard. How to perform this step is covered in a separate document.
4) If you want email capability in Puppy, other than using webmail exclusively, Click the "Email" button on the desktop. Enter what you need to set up an email account. Here you will enter your email address, and the names of the pop and smtp servers that you want to use. If you do this wrong, you will not have email. If you choose to use webmail, only, you do not need to perform this step.
5) If you have made changes to what you see later, at the next time Puppy is booted, you want these changes to be made permanent, click the "Save" button on the desktop. Do not click this button unless you want changes to be permanent.
A file on the boot device that has the file extension .2fs. This is where your changes will be saved.
After all this is said and done, let us now check the speed of your Internet connection. Click here: DSL speed test
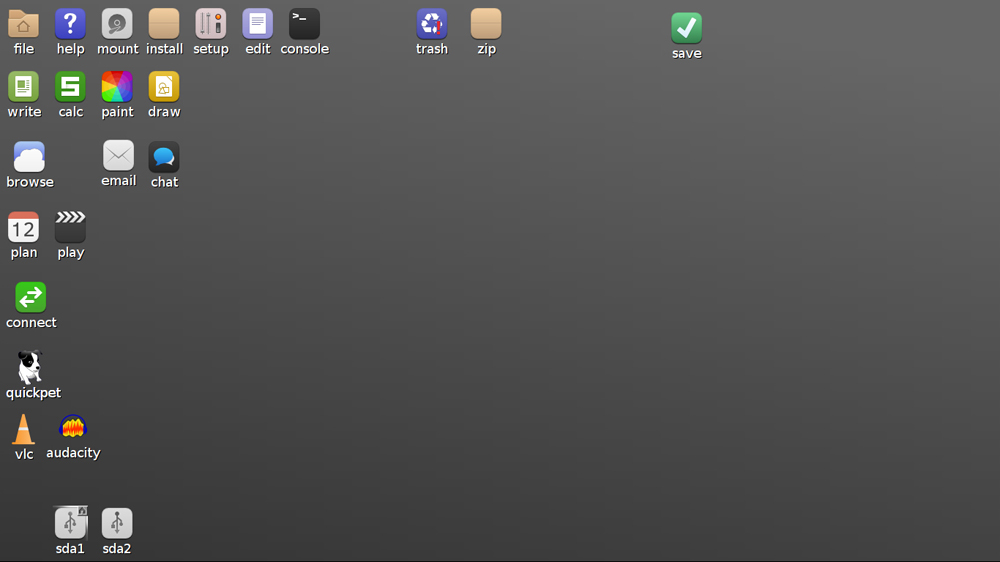
When Puppy is booted, the user is presented with a Windows-like desktop:
Frequently used tasks are performed by clicking the appropriate ikon on the desktop. But, there are many tasks that are not represented by these ikons. Nevertheless, these other tasks, programs, etc., are all available by bringing up what will hereinafter be called the Menu, shown here:
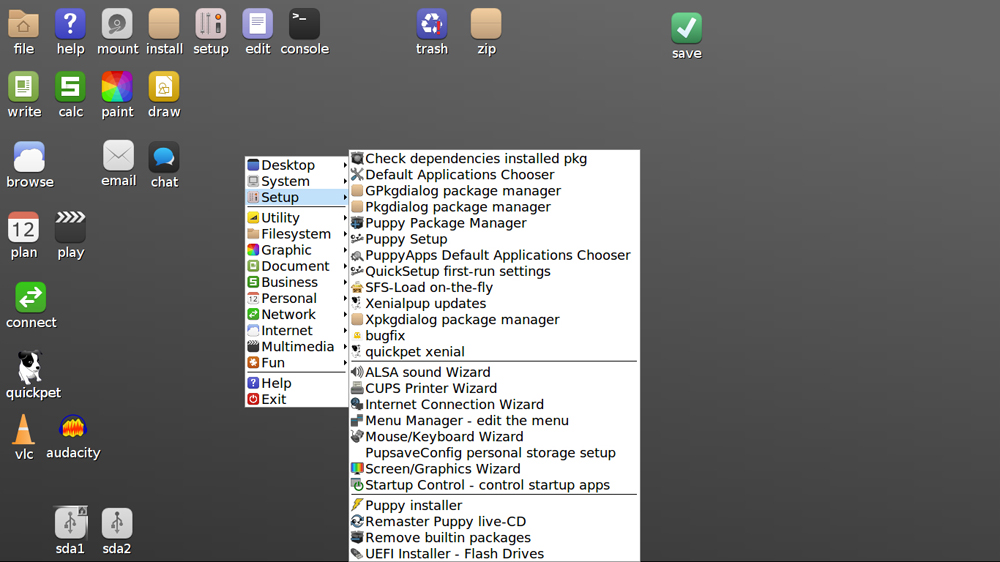
An abbreviated list of the tasks that can be executed using the Menu is given here: here.
The Menu is brought up by placing the cursor in a blank portion of the desktop and pressing the right key on the mouse. The Menu window will be presented. This will display a window with a set of categories shown on the left. Clicking a category on the left will show a set of tasks. Clicking on one of the tasks will cause the selected program to be executed.
Bringing up the Menu can also be accomplished by clicking the Menu button in the far lower left position on the desktop.
This Routine Booting of Puppy.
Once booting is accomplished, tasks may now be performed.
To execute all of the commonly used tasks in Puppy, click one of the desktop ikons. Or, for a greater selection of tasks, the Puppy Menu, as described above, is used.
At any time, the User may insert a USB thumb drive in the computer. Puppy will recognize its presence by showing a disk icon on the desktop. When the User clicks this icon, a window will appear that is quite similar to an Explorer window of the Windows Operating System. The User is free to 'drag and drop' files to and from the USB drive. All of the files are completely compatible with The Windows Operation System.
Running Windows Programs Under Puppy
Let us say the User has placed a Windows program on the USB drive. Lets call it myprog.exe. To execute this program in Puppy, the "Console" button on the desktop is clicked. Then, the following line is typed: "wine /mnt/sda1/myprog.exe". Depending upon what disks Puppy finds on the computer, "sda1" may be a different name, but Puppy will tell what to use by the label of the disk ikon on the desktop. In the event that windows are employed in myprog.exe, the word "wine" should be replaced by the word "wineconsole"
Working with C language programs
The entire complement of the Gnu compilers is available during the Puppy session. Describing the use of these programs is beyond the scope of this document. But, clicking the Console button on the desktop makes all of these programs available through the command prompt well known to the users of such programs.
When a session is saved, and this session is a desired starting point in case of some sort of failure, you, the user, should copy the .2fs file off to a safe place. In the event of a failure at a later time, all can be made right by copying the saved .2fs file back to its proper place on the Boot Device.
The User Manual for Puppy is found here: Puppy Linux Click on "Manual-English" on the right side of the screen.
7/28/18